> For the complete documentation index, see [llms.txt](https://docs.roboflow.com/llms.txt). Markdown versions of documentation pages are available by appending `.md` to page URLs; this page is available as [Markdown](https://docs.roboflow.com/datasets/create-and-upload/create-a-project.md).

# Create a Project

## About

Before you train a model, you need to create a Project.

A Project contains images and annotations. This data can then be turned into a dataset version, a snapshot of your data frozen in time. Versions can then be used to train models.

## Web App

### Create a Project

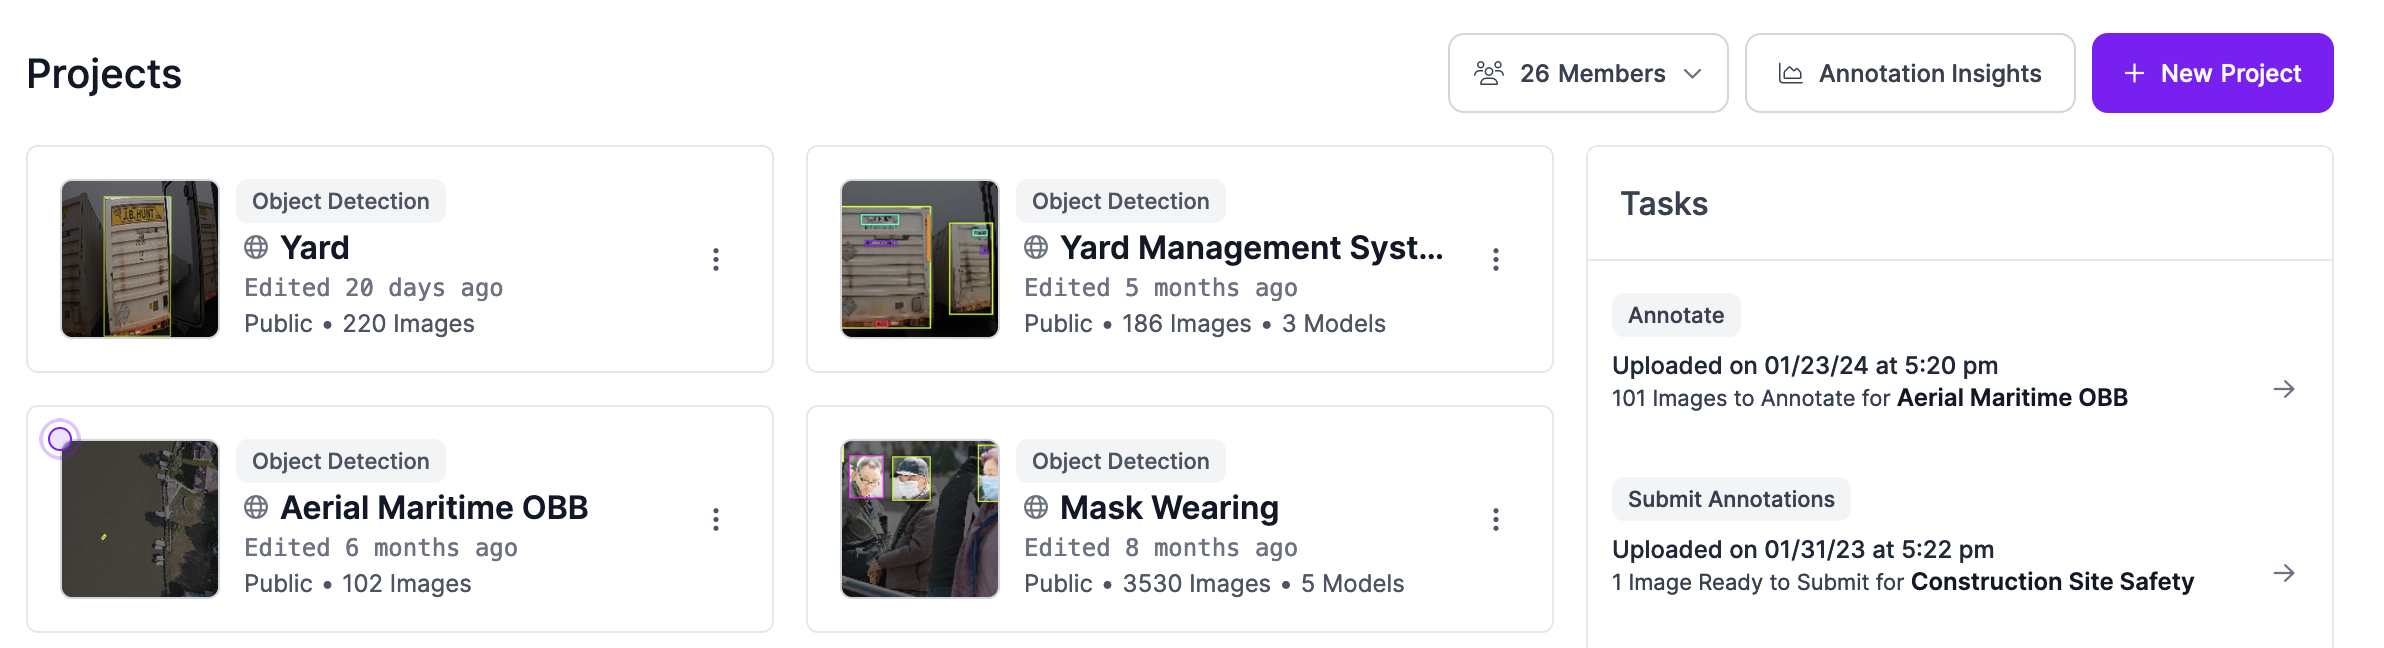
First, go to the Roboflow dashboard. Then, click "Create New Project":

<figure><img src="/files/mcIScMj9F9RYEngvp4Hl" alt=""><figcaption></figcaption></figure>

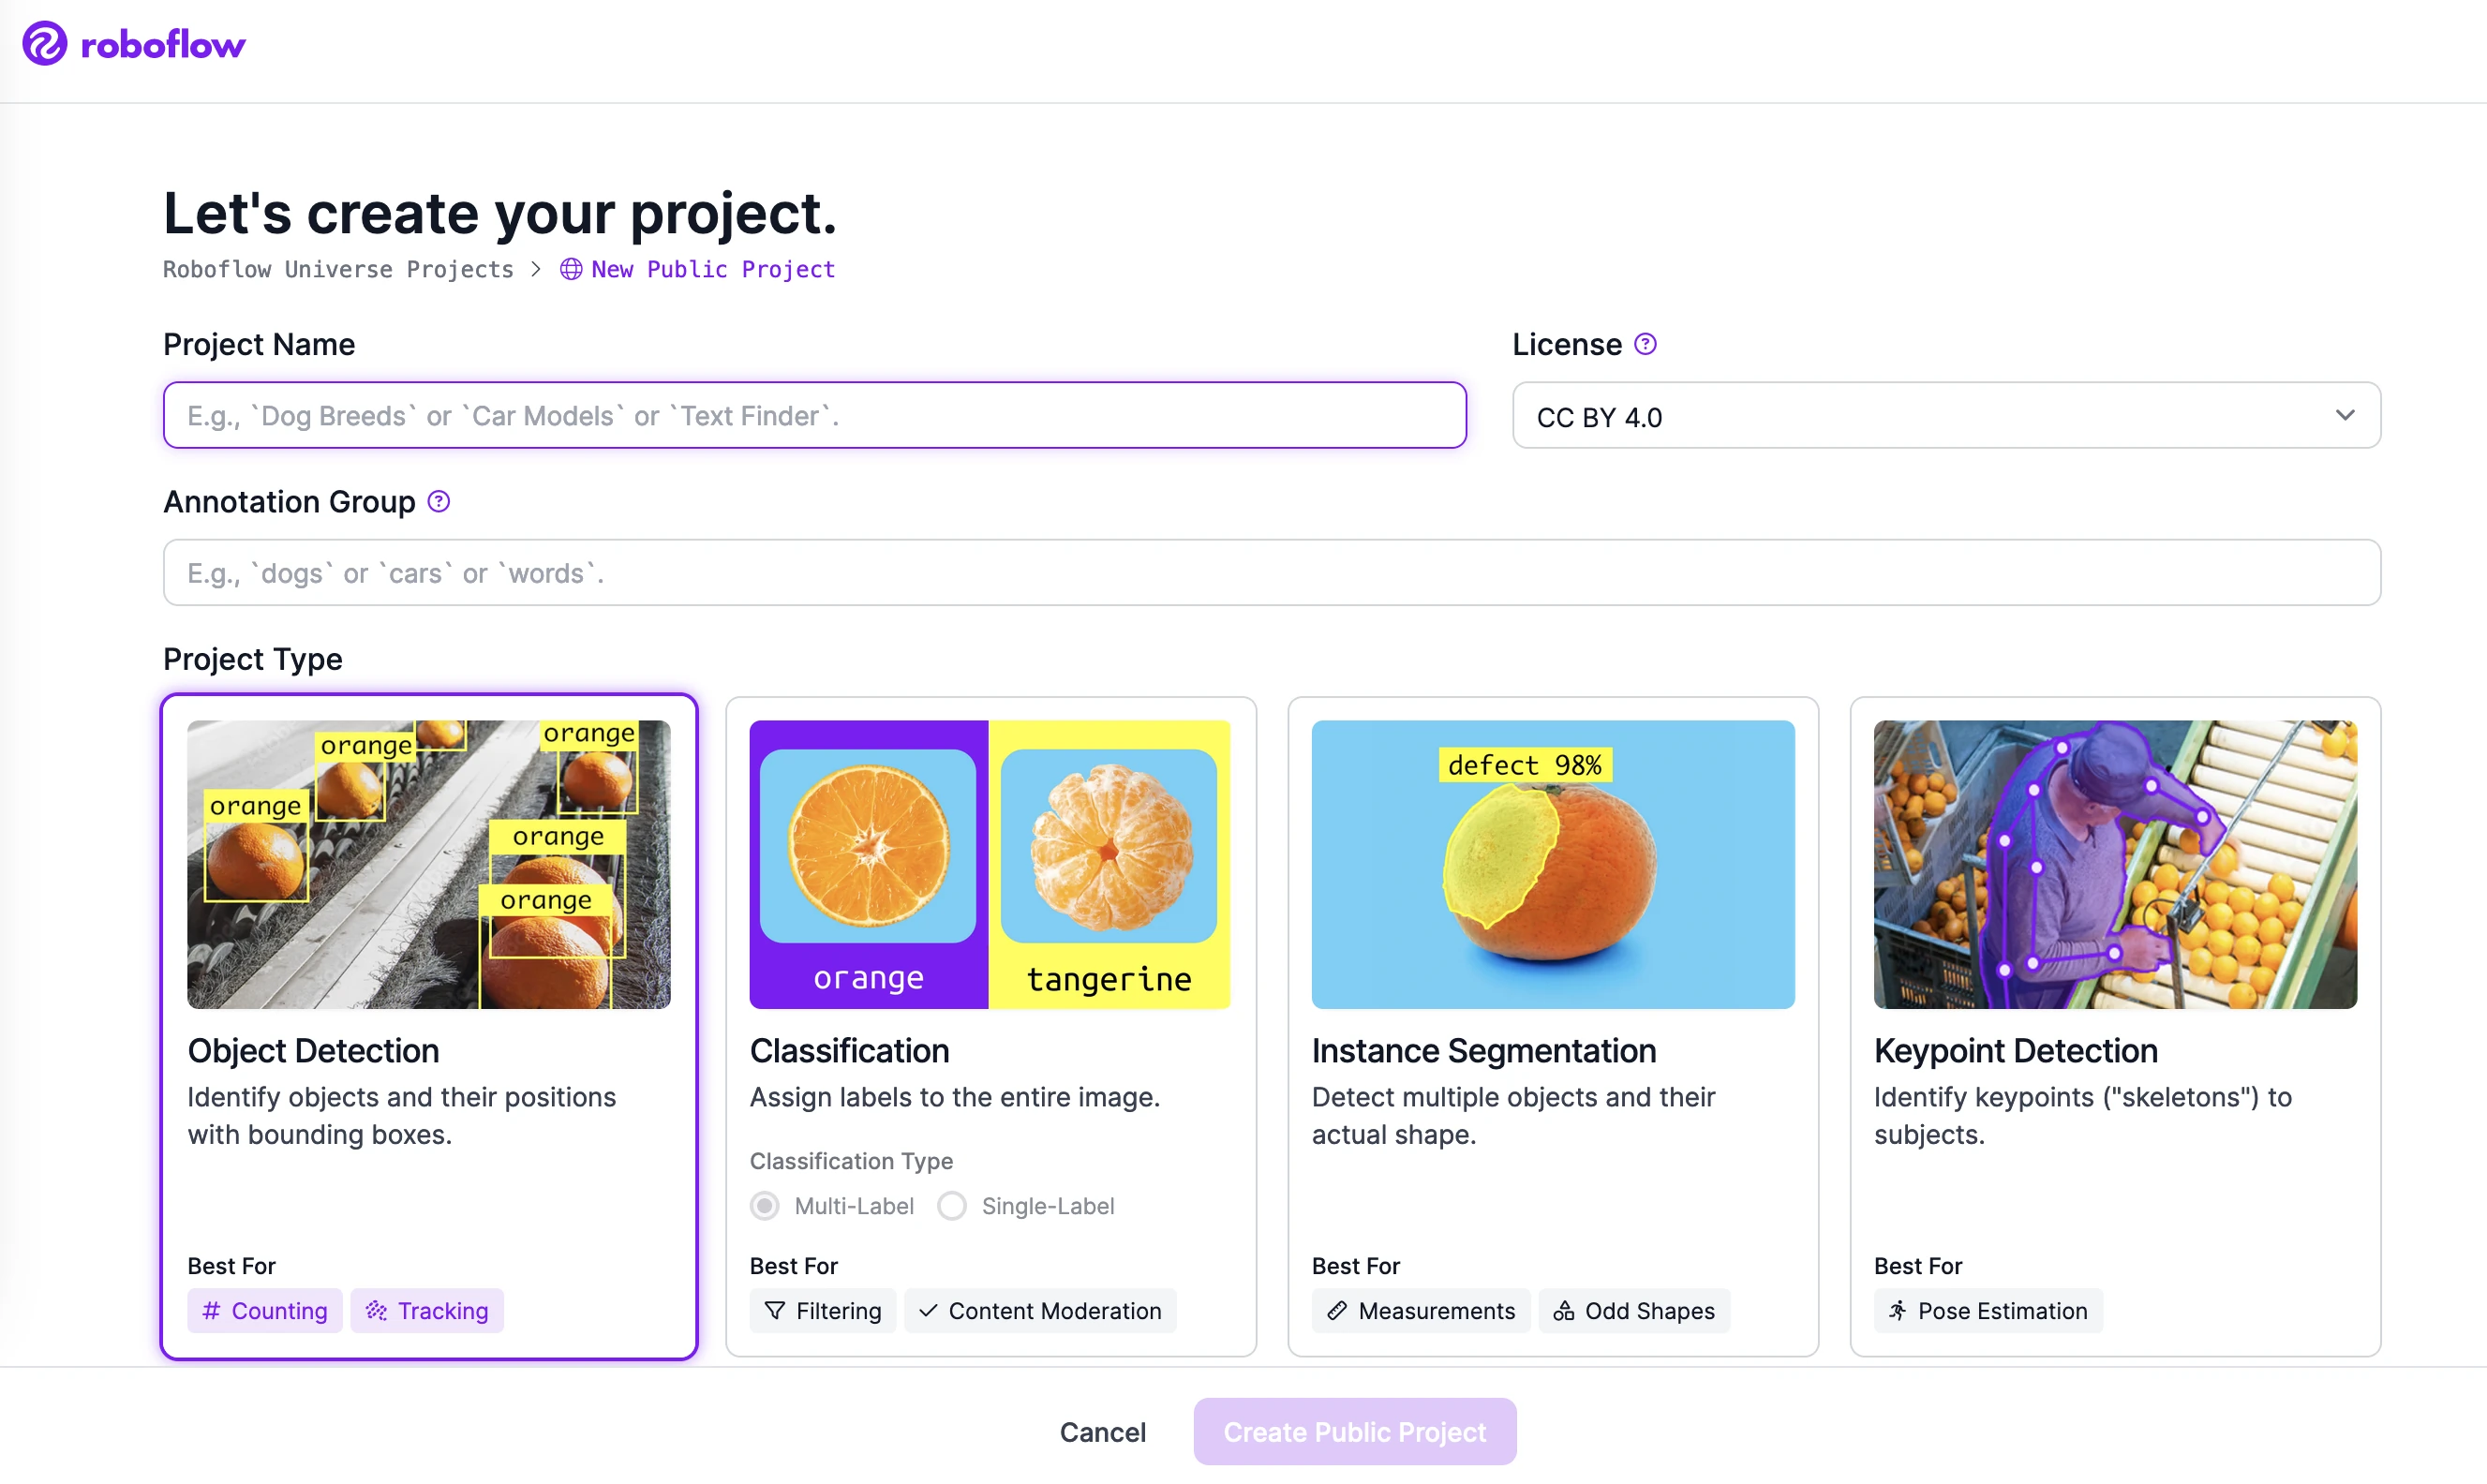
You will be taken to a page where you can create a new project:

<figure><img src="/files/aMu4l26iQpmeDQfMB7oF" alt=""><figcaption></figcaption></figure>

On this page, you will need to fill out:

1. **A project type**.
   1. ***Object Detection***: Find the location of objects in an image.
   2. ***Single-Label Classification***: Given a limited set of categories, assign a label to an image.
   3. ***Multi-Label Classification***: Given a limited set of categories, assign an arbitrary number of labels that are relevant to the image.
   4. ***Instance Segmentation***: To the pixel level, find the location of objects in an image.
   5. ***Semantic Segmentation***: To the pixel level, find the location of objects in an image and create unique references for each object found.
   6. ***Keypoint Detection***: Find the location of objects and their keypoints in an image. Commonly used for determining the pose of an object.
2. **A project name:** The name of your project.
3. **Annotation group:** A label that categorizes what you are detecting in your images (e.g. "chess pieces", "vehicles", "defects"). Projects that share the same annotation group also share their class list and annotations. See [Annotation Groups](/datasets/annotate/annotation-groups.md) for more details.

When you have specified these values, submit the form to create the project.

*If you would like to see another type of project supported you can select the option from the dropdown of project types to indicate your interest.*

{% hint style="info" %}
If you are on a free plan, your datasets and models will be [available on Roboflow Universe](/datasets/universe/universe/what-is-roboflow-universe.md). If you are on a paid plan, you can create private projects. Private projects are only accessible to your Workspace and are never public.
{% endhint %}

## HTTP API

<mark style="color:green;">`POST`</mark> `/:workspace/projects`

Create a project in a workspace.

**Example Request**

```bash
curl -X POST "https://api.roboflow.com/my-workspace/projects?api_key=$ROBOFLOW_API_KEY" \
  -H "Content-Type: application/json" \
  -d '{
    "name": "Sharks Dataset",
    "type": "object-detection",
    "annotation": "sharks",
    "license": "MIT"
  }'
```

**Body**

<table><thead><tr><th width="160">Name</th><th width="120">Type</th><th>Description</th><th data-type="checkbox">Required</th></tr></thead><tbody><tr><td><code>name</code></td><td>string</td><td>Display name for the project. The URL slug is auto-generated from this.</td><td>true</td></tr><tr><td><code>type</code></td><td>string</td><td>Project type. One of <code>object-detection</code>, <code>single-label-classification</code>, <code>multi-label-classification</code>, <code>instance-segmentation</code>, <code>semantic-segmentation</code>, <code>keypoint-detection</code>.</td><td>true</td></tr><tr><td><code>annotation</code></td><td>string</td><td>Annotation group - a noun describing what's being labeled (e.g. <code>"sharks"</code>, <code>"defects"</code>).</td><td>true</td></tr><tr><td><code>license</code></td><td>string</td><td>License for the project. Required for workspaces that aren't already public. Accepted values: <code>Public Domain</code>, <code>MIT</code>, <code>CC BY 4.0</code>, <code>BY-NC-SA 4.0</code>, <code>OBdL v1.0</code>, <code>Private</code> (paid plans only).</td><td>false</td></tr><tr><td><code>group</code></td><td>string</td><td>Id of a project folder to place this project in. See <a href="/pages/yEeXTKcO9VYyS6U1YMvF#http-api">Manage Project Folders</a>.</td><td>false</td></tr></tbody></table>

**Example Response**

```json
{
    "id": "my-workspace/sharks-dataset",
    "type": "object-detection",
    "name": "Sharks Dataset",
    "created": 1688739471567,
    "updated": 1688739471567,
    "images": 0,
    "unannotated": 0,
    "annotation": "sharks",
    "versions": 0,
    "public": false,
    "splits": {},
    "colors": {},
    "classes": {},
    "icon": null
}
```

Required scope: `project:create`.

### SDK and CLI equivalents

* SDK: see [Create a Project (SDK)](#python-sdk).
* CLI: see [Create a Project (CLI)](#cli).

## Python SDK

`Workspace.create_project()` creates a new project in the workspace and returns a `Project` object you can then upload images to.

```python
import roboflow

rf = roboflow.Roboflow(api_key="YOUR_API_KEY")

project = rf.workspace().create_project(
    project_name="Flower detector",
    project_type="object-detection",
    project_license="MIT",
    annotation="flowers",
)
print(project.id)
```

### Parameters

* `project_name` (str) - the display name. The URL slug is auto-generated from this.
* `project_type` (str) - one of:
  * `object-detection`
  * `single-label-classification`
  * `multi-label-classification`
  * `instance-segmentation`
  * `semantic-segmentation`
  * `keypoint-detection`
* `project_license` (str) - set to `"Private"` for private projects (paid plans only). Public-license values include `"MIT"`, `"CC BY 4.0"`, `"Public Domain"`, etc. - see the project creation form in the web app for the full list.
* `annotation` (str) - the annotation group: a noun describing what's being labeled (`"flowers"`, `"vehicles"`, `"defects"`). Used in the labeling UI prompts.

### REST and CLI equivalents

* REST: see [Create a Project (REST)](#http-api).
* CLI: see [Create a Project (CLI)](#cli).

## CLI

You can create new projects from the command line.

### Command

```bash
roboflow project create <name> --type <project-type>
```

#### Options

| Flag           | Description                                                |
| -------------- | ---------------------------------------------------------- |
| `--type`       | Project type (required). See supported types below         |
| `--license`    | License for the project (optional)                         |
| `--annotation` | Annotation group name (optional, defaults to project name) |

#### Supported Project Types

* `object-detection`
* `single-label-classification`
* `multi-label-classification`
* `instance-segmentation`
* `semantic-segmentation`
* `keypoint-detection`

### Examples

Create an object detection project:

```bash
roboflow project create my-detector --type object-detection
```

Create a classification project:

```bash
roboflow project create breed-classifier --type single-label-classification
```

### JSON Output

```bash
roboflow project create my-detector --type object-detection --json
```

```json
{
  "status": "created",
  "project": "my-detector",
  "type": "object-detection",
  "workspace": "my-workspace"
}
```

## Next steps

* Add images and other data to your project. See [Add Data](/datasets/create-and-upload/adding-data.md).
* Label your images so they can be used to train a model. See [Introduction to Roboflow Annotate](/datasets/annotate/annotate/annotation-tools.md).