> For the complete documentation index, see [llms.txt](https://docs.roboflow.com/llms.txt). Markdown versions of documentation pages are available by appending `.md` to page URLs; this page is available as [Markdown](https://docs.roboflow.com/get-started/ko/guides/run-a-model-locally.md).
# 로컬에서 모델 실행
Docker 추론 서버를 사용해 5분 만에 자신의 하드웨어에서 Roboflow 모델을 실행하세요.
[Roboflow Inference](https://docs.roboflow.com/deployment/self-hosted/self-hosted) Roboflow의 호스팅 모델을 뒷받침하는 무료 오픈 소스 엔진입니다. 같은 모델을 자신의 컴퓨터에서 실행할 수 있습니다: Docker 컨테이너에서 추론 서버를 시작한 다음 HTTP 또는 Python [Inference SDK](https://docs.roboflow.com/reference/inference/inference-sdk). 직접 실행하면 이미지를 자신의 기기에 보관할 수 있고 설정을 완전히 제어할 수 있습니다. 로컬 추론은 크레딧을 사용하지 않습니다.
## 내 기기에서 모델 실행하기
{% tabs %}
{% tab title="HTTP(Python)" icon="webhook" %}
{% stepper %}
{% step %}
### 추론 서버 시작
`inference server start` 를 시작하면 [Inference Server](https://docs.roboflow.com/deployment/self-hosted/inference-server) 를 Docker 컨테이너에서 실행하고 하드웨어에 맞는 올바른 버전(CPU, NVIDIA GPU 또는 Jetson)을 선택합니다. [Docker](https://docs.docker.com/get-docker/) 가 설치되어 있고 실행 중이어야 합니다.
```bash
pip install inference-cli && inference server start
```
서버는 다음에서 수신 대기합니다. `http://localhost:9001`. 기기별 설정 및 문제 해결은 다음을 참조하세요. [Inference 설치 가이드](https://docs.roboflow.com/deployment/self-hosted/inference-server/install).
{% endstep %}
{% step %}
### 의존성 설치
`supervision` 은 결과를 그려주고 다음을 가져옵니다. `cv2` 및 `numpy`:
```bash
pip install -U supervision
```
{% endstep %}
{% step %}
### 모델 실행
이미지를 로컬 서버로 전송하고 바로 사용할 수 있는 [RF-DETR](https://docs.roboflow.com/models/supported-models/rf-detr) 모델을 실행하세요. RF-DETR은 Apache 2.0 라이선스이므로, 라이선스 비용 없이 상용 제품에 자체 호스팅할 수 있습니다. 이와 같은 바로 사용할 수 있는 모델은 API 키가 필요하지 않습니다:
```python
import base64
import cv2
import requests
import supervision as sv
image = sv.load_image_from_url("https://media.roboflow.com/quickstart/cars.jpg")
image_b64 = base64.b64encode(content).decode("utf-8")
result = requests.post(
"http://localhost:9001/coco/38", # coco/38 == rfdetr-nano
data=image_b64, # 본문에 있는 원시 base64
headers={"Content-Type": "application/x-www-form-urlencoded"},
).json()
detections = sv.Detections.from_inference(result)
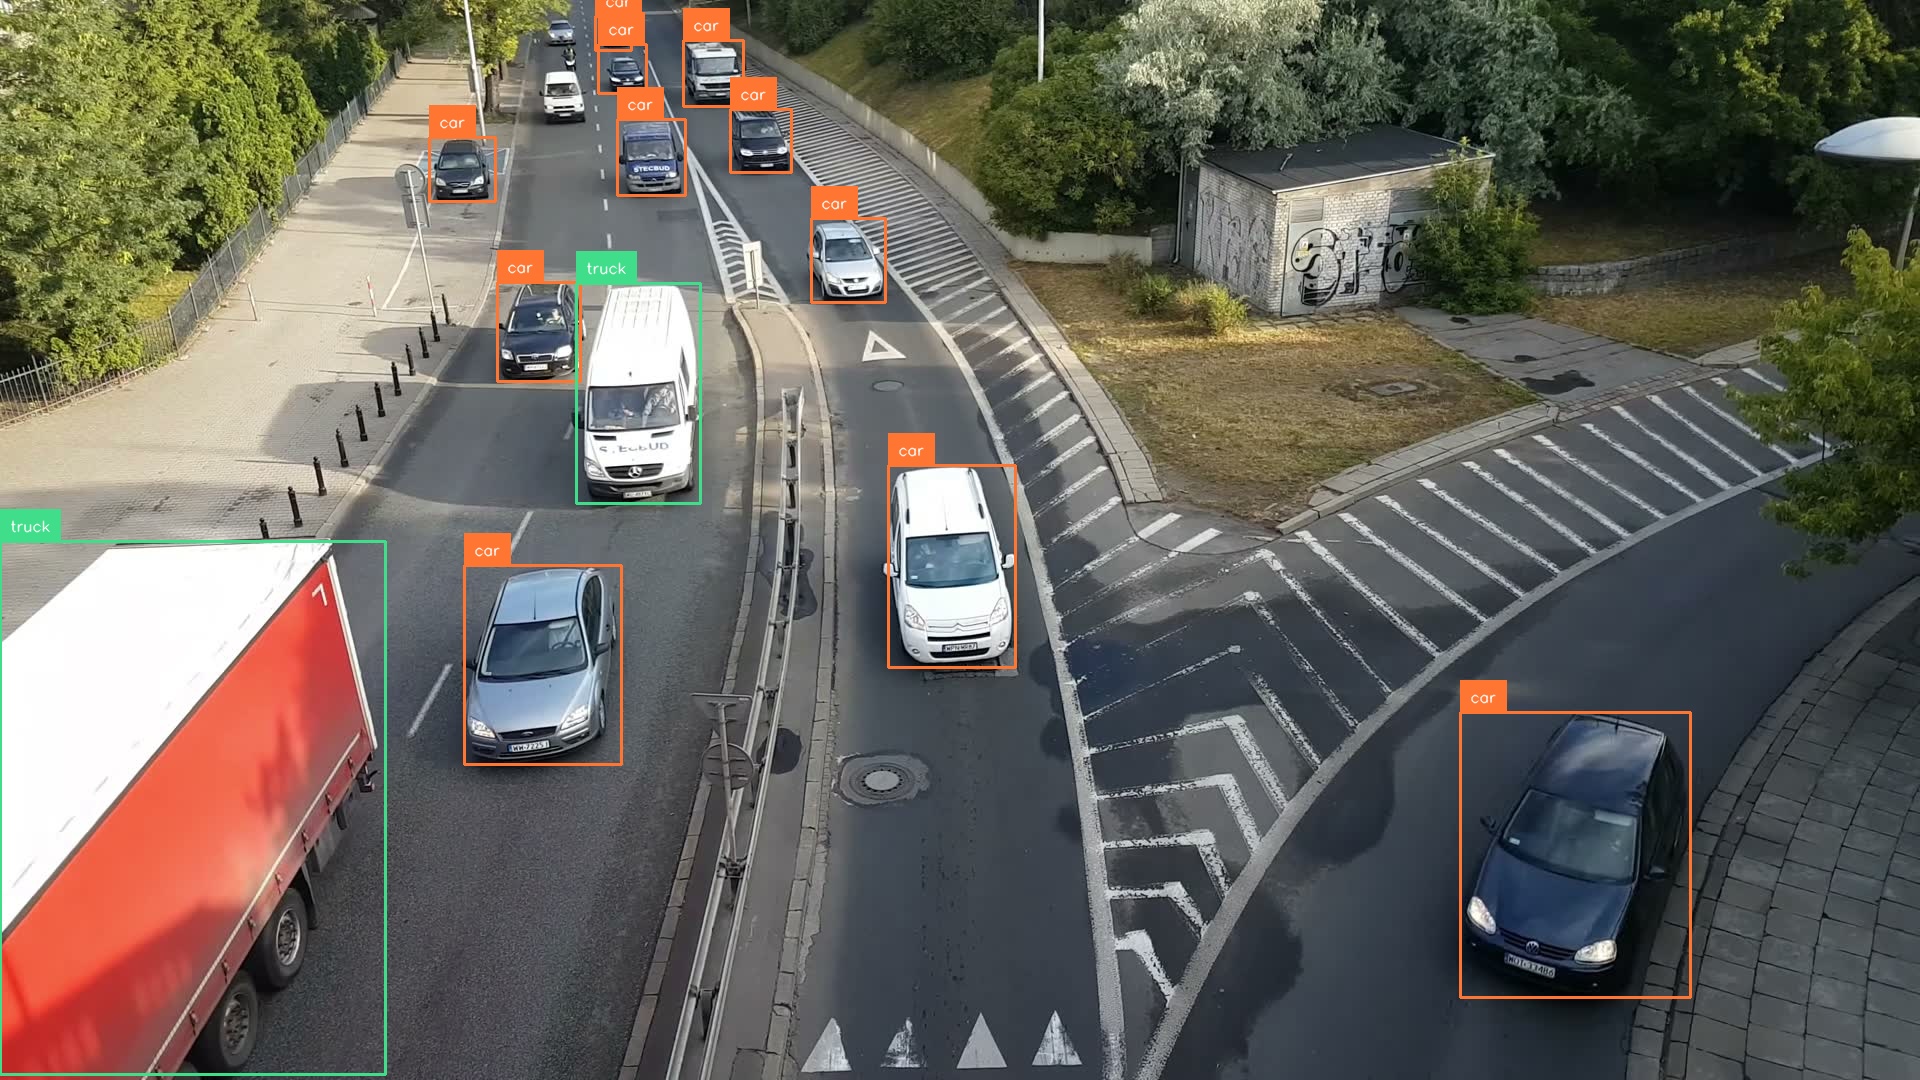
print(f"{len(detections)}개의 객체를 찾았습니다")
annotated = sv.BoxAnnotator().annotate(image.copy(), detections)
annotated = sv.LabelAnnotator().annotate(annotated, detections)
cv2.imwrite("output.jpg", annotated)
```
{% endstep %}
{% endstepper %}
{% endtab %}
{% tab title="SDK(Python)" icon="python" %}
{% stepper %}
{% step %}
### 추론 서버 시작
`inference server start` 를 시작하면 [Inference Server](https://docs.roboflow.com/deployment/self-hosted/inference-server) 를 Docker 컨테이너에서 실행하고 하드웨어에 맞는 올바른 버전(CPU, NVIDIA GPU 또는 Jetson)을 선택합니다. [Docker](https://docs.docker.com/get-docker/) 가 설치되어 있고 실행 중이어야 합니다.
```bash
pip install inference-cli && inference server start
```
서버는 다음에서 수신 대기합니다. `http://localhost:9001`. 기기별 설정 및 문제 해결은 다음을 참조하세요. [Inference 설치 가이드](https://docs.roboflow.com/deployment/self-hosted/inference-server/install).
{% endstep %}
{% step %}
### SDK 설치
`supervision` 은 결과를 그려주고 다음을 가져옵니다. `cv2` 및 `numpy`:
```bash
pip install -U inference-sdk supervision
```
{% endstep %}
{% step %}
### 모델 실행
클라이언트를 로컬 서버에 연결하고 바로 사용할 수 있는 [RF-DETR](https://docs.roboflow.com/models/supported-models/rf-detr) 모델을 실행하세요. RF-DETR은 Apache 2.0 라이선스이므로, 라이선스 비용 없이 상용 제품에 자체 호스팅할 수 있습니다. 이와 같은 바로 사용할 수 있는 모델은 API 키가 필요하지 않습니다:
```python
import cv2
import supervision as sv
from inference_sdk import InferenceHTTPClient
image = sv.load_image_from_url("https://media.roboflow.com/quickstart/cars.jpg")
client = InferenceHTTPClient(api_url="http://localhost:9001")
result = client.infer(image, model_id="rfdetr-nano")
detections = sv.Detections.from_inference(result)
print(f"{len(detections)}개의 객체를 찾았습니다")
annotated = sv.BoxAnnotator().annotate(image.copy(), detections)
annotated = sv.LabelAnnotator().annotate(annotated, detections)
cv2.imwrite("output.jpg", annotated)
```
{% endstep %}
{% endstepper %}
{% endtab %}
{% endtabs %}
첫 번째 요청은 모델을 다운로드하므로 몇 초가 걸릴 수 있습니다. 이후 요청은 빠릅니다.
로컬 추론 서버에서 가져온 RF-DETR 감지 결과
## 비디오 처리
비디오에서 모델을 실행하려면 서버와 WebRTC 세션을 열고 비디오가 재생되는 동안 처리된 프레임과 예측 결과를 수신하세요. 컴퓨터가 속도를 따라가지 못하면 서버는 실시간을 유지하기 위해 프레임을 건너뜁니다. 같은 SDK로 하나의 모델이나 [워크플로](https://docs.roboflow.com/workflows).
{% hint style="info" %}
위의 이미지 예제와 같은 방식으로 한 번에 한 프레임씩 보내 HTTP를 통해 비디오에서 모델을 실행할 수도 있습니다(스트리밍 추가 기능 불필요). 이 방법은 더 느립니다. 다음 프레임이 시작되기 전에 각 프레임을 보내고, 처리하고, 그려야 하므로 중간에 대기 시간이 많이 생깁니다. SDK는 전체 비디오를 스트리밍하고 여러 프레임을 동시에 처리하므로 훨씬 더 잘 따라갑니다.
{% endhint %}
{% stepper %}
{% step %}
### SDK 설치
비디오 스트리밍에는 `webrtc` 추가 기능이 필요합니다:
```bash
pip install "inference-sdk[webrtc]"
```
{% endstep %}
{% step %}
### 비디오에서 모델 실행
```python
import cv2
from inference_sdk import InferenceHTTPClient
from inference_sdk.webrtc import VideoFileSource
import supervision as sv
client = InferenceHTTPClient.init(api_url="http://localhost:9001")
# 비디오 다운로드+캐시
source = VideoFileSource("https://media.roboflow.com/quickstart/cars.mp4")
# 최적화된 비디오 스트리밍을 위해 webrtc 사용
session = client.webrtc.stream(
source=source,
model_id="rfdetr-nano"
)
# on_frame은 메인 스레드에서 실행되므로 cv2.imshow를 안전하게 사용할 수 있습니다
@session.on_frame
def show(frame, data):
det = sv.Detections.from_inference(data)
img = sv.BoxAnnotator().annotate(frame, det)
img = sv.LabelAnnotator().annotate(img, det)
cv2.imshow("RF-DETR", img)
if cv2.waitKey(1) == ord("q"):
session.close()
session.run()
cv2.destroyAllWindows()
```
{% endstep %}
{% endstepper %}
{% embed url="" %}
더 풍부한 파이프라인(추적, 필터링, 구역, 알림)을 [Workflows 편집기](https://docs.roboflow.com/workflows/build/create-a-workflow)에서 시각적으로 구성한 뒤, 같은 WebRTC 클라이언트를 통해 실행하세요. [Workflows를 사용한 비디오 처리](https://docs.roboflow.com/workflows/deploy/video-processing).
## 기타 옵션
* 하드웨어를 직접 운영하지 않는 관리형 엔드포인트를 선호하시나요? [Dedicated Deployment](https://docs.roboflow.com/deployment/roboflow-cloud/dedicated-deployments) 또는 [Serverless Cloud API](https://docs.roboflow.com/deployment/roboflow-cloud/serverless-api).
* 온프레미스, 에어갭 또는 Kubernetes 배포가 필요하신가요? 다음을 참조하세요. [Enterprise Deployment](https://docs.roboflow.com/deployment/self-hosted/enterprise).
* 다음에서 모든 옵션을 비교하세요. [모델 또는 워크플로 배포](https://docs.roboflow.com/deployment).