> For the complete documentation index, see [llms.txt](https://docs.roboflow.com/llms.txt). Markdown versions of documentation pages are available by appending `.md` to page URLs; this page is available as [Markdown](https://docs.roboflow.com/get-started/ko/guides/run-model-serverless-api.md).
# 모델 API 엔드포인트 사용
별도의 하드웨어 설정 없이 5분 만에 Roboflow의 클라우드 GPU에서 모델을 실행하세요.
해당 [서버리스 클라우드 API](https://docs.roboflow.com/deployment/roboflow-cloud/serverless-api) Roboflow의 클라우드에서 GPU로 모델과 워크플로를 실행합니다. 이미지를 보내면 결과를 돌려받습니다. 설정할 하드웨어도, 계속 실행해 둘 서버도 없습니다.
이 가이드는 아무것도 모르는 상태에서 5분 안에 모델을 실행하는 데까지 안내합니다. 이름만 붙여 이미지에서 객체를 찾고, 바로 사용할 수 있는 미리 만들어진 모델로 일상적인 객체를 감지하고, 같은 Serverless Cloud API 엔드포인트에서 자신의 모델도 실행할 수 있습니다.
## 이름으로 객체 찾기
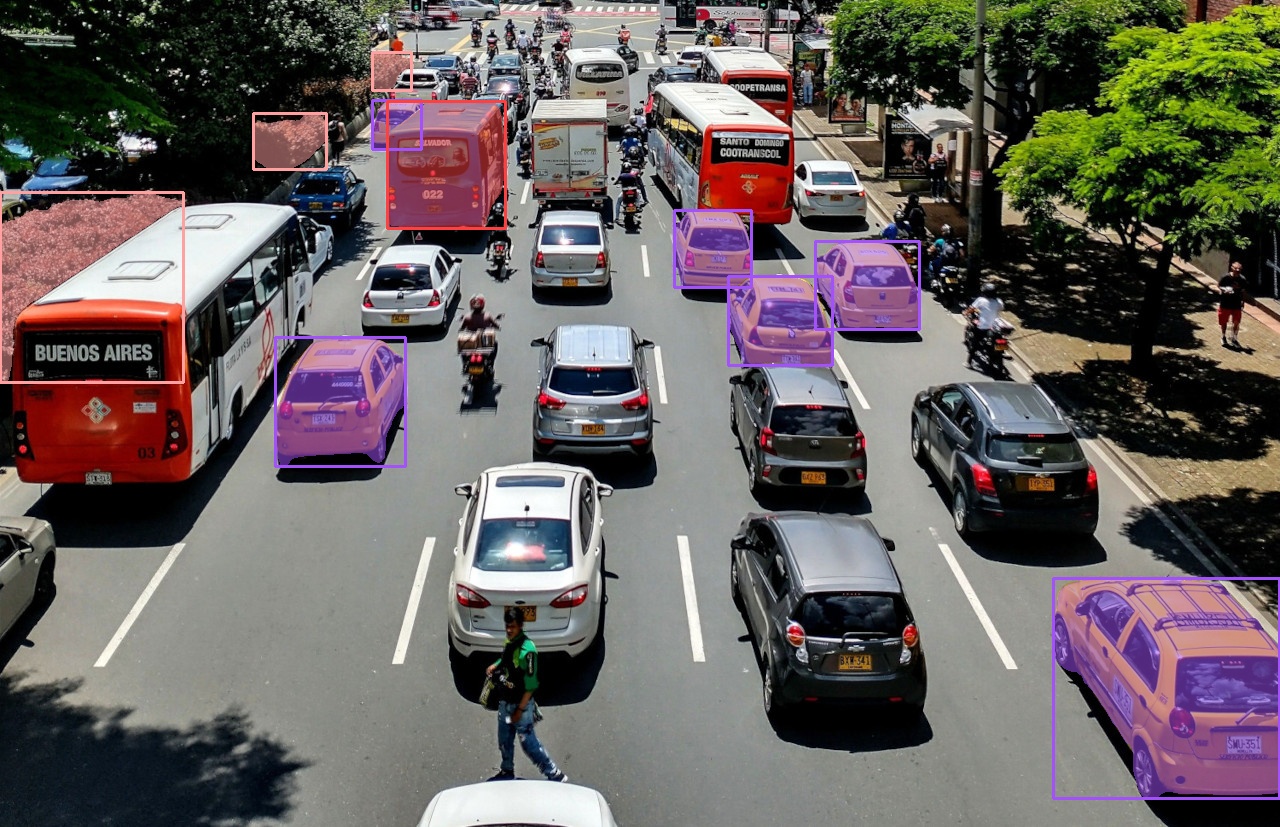
모델에 다음과 같은 몇 단어를 입력하세요 `"택시"`, `"파란 버스"` 또는 `"덤불"` 를 입력하면 이미지에서 일치하는 모든 객체의 윤곽을 표시합니다. 먼저 설정하거나 학습할 것은 없습니다. 이 기능은 [SAM3](https://docs.roboflow.com/models/supported-models/sam3).
{% tabs %}
{% tab title="HTTP (파이썬)" icon="webhook" %}
{% stepper %}
{% step %}
### API 키 받기
Roboflow 계정을 만들고, 다음에서 키를 찾으세요 [Roboflow API 설정 페이지](https://app.roboflow.com/settings/api) 그리고 셸에서 사용할 수 있도록 설정하세요:
```bash
export ROBOFLOW_API_KEY="your-key-here"
```
{% endstep %}
{% step %}
### 의존성 설치
`supervision` 다음을 가져옵니다 `cv2` 및 `numpy`:
```bash
pip install -U supervision
```
{% endstep %}
{% step %}
### 모델 실행
다음으로 POST 요청을 보내세요 `/sam3/concept_segment` 모델을 실행합니다. `sv.Detections.from_sam3` 는 해당 결과를 다음이 그릴 수 있는 형식으로 바꿉니다: [`supervision`](https://supervision.roboflow.com) 그릴 수 있습니다:
```python
import os
import base64
import cv2
import requests
import supervision as sv
image = sv.load_image_from_url("https://media.roboflow.com/quickstart/traffic.jpg")
image_b64 = base64.b64encode(content).decode("utf-8")
h, w = image.shape[:2]
response = requests.post(
"https://serverless.roboflow.com/sam3/concept_segment",
headers={"Authorization": f"Bearer {os.environ['ROBOFLOW_API_KEY']}"},
json={
"image": {"type": "base64", "value": image_b64},
"prompts": [
{"type": "text", "text": "택시"},
{"type": "text", "text": "파란 버스"},
{"type": "text", "text": "덤불"},
],
},
)
detections = sv.Detections.from_sam3(response.json(), (w, h))
annotated = sv.MaskAnnotator().annotate(image.copy(), detections)
cv2.imwrite("sam3.jpg", annotated)
```
{% endstep %}
{% endstepper %}
{% endtab %}
{% tab title="SDK (파이썬)" icon="python" %}
{% stepper %}
{% step %}
### API 키 받기
Roboflow 계정을 만들고, 다음에서 키를 찾으세요 [Roboflow API 설정 페이지](https://app.roboflow.com/settings/api) 그리고 셸에서 사용할 수 있도록 설정하세요:
```bash
export ROBOFLOW_API_KEY="your-key-here"
```
{% endstep %}
{% step %}
### 의존성 설치
이 두 패키지는 모델을 호출하고 결과를 그려줍니다:
```bash
pip install -U inference-sdk supervision
```
{% endstep %}
{% step %}
### 모델 실행
해당 [Inference SDK](https://docs.roboflow.com/reference/inference/inference-sdk) 이미지를 클라우드로 보내고 결과를 반환합니다. `sv.Detections.from_sam3` 는 해당 결과를 다음이 그릴 수 있는 형식으로 바꿉니다: [`supervision`](https://supervision.roboflow.com) 그릴 수 있습니다:
```python
import os
import cv2
import supervision as sv
from inference_sdk import InferenceHTTPClient, InferenceConfiguration
image = sv.load_image_from_url("https://media.roboflow.com/quickstart/traffic.jpg")
h, w = image.shape[:2]
client = InferenceHTTPClient(
api_url="https://serverless.roboflow.com",
api_key=os.environ["ROBOFLOW_API_KEY"],
).configure(InferenceConfiguration(api_key_transport="header"))
data = client.sam3_concept_segment(
image,
prompts=[
{"type": "text", "text": "택시"},
{"type": "text", "text": "파란 버스"},
{"type": "text", "text": "덤불"},
],
)
detections = sv.Detections.from_sam3(data, (w, h))
annotated = sv.MaskAnnotator().annotate(image.copy(), detections)
annotated = sv.BoxAnnotator().annotate(annotated, detections)
cv2.imwrite("sam3.jpg", annotated)
```
{% endstep %}
{% endstepper %}
{% endtab %}
{% endtabs %}
응답에는 각 프롬프트에 대해 찾은 윤곽이 나열되며, 각 항목마다 신뢰도 점수가 표시됩니다. `sv.Detections.from_sam3` 이 모든 것을 대신 읽어줍니다.
텍스트 프롬프트에서 윤곽이 표시된 객체
시각적 프롬프트, 예시 박스, RLE 출력을 포함한 전체 SAM3 API는 다음을 참조하세요. [SAM3 문서](https://docs.roboflow.com/models/supported-models/sam3).
## 미리 만들어진 모델로 일상적인 객체 감지하기
{% tabs %}
{% tab title="HTTP (파이썬)" icon="webhook" %}
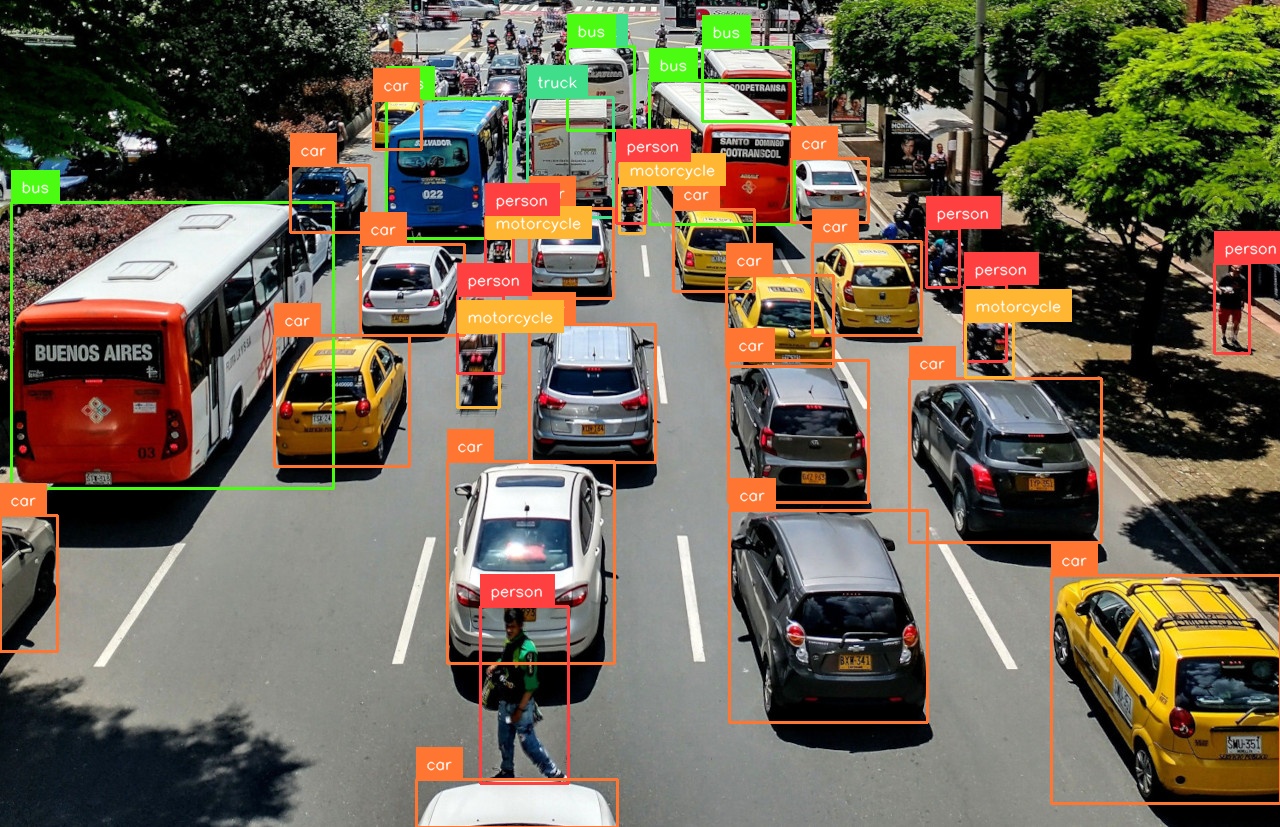
이름을 지정한 객체의 윤곽을 그리는 대신 일반적인 객체 주위에 박스를 그리려면 다음을 호출하세요: `POST /{project}/{version}` 모델 ID를 사용합니다. `POST /sam3/concept_segment`. 이 예제는 미리 만들어진 [RF-DETR](https://docs.roboflow.com/models/supported-models/rf-detr) 모델을 사용합니다. 이 모델은 차량, 사람, 반려동물 같은 일반적인 객체를 감지할 수 있습니다. RF-DETR은 Apache 2.0 라이선스이므로 상업적 사용도 무료입니다:
```python
result = requests.post(
"https://serverless.roboflow.com/coco/40", # coco/40는 rfdetr-medium의 별칭입니다
data=image_b64, # 본문에 raw base64를 사용하며, JSON이 아닙니다
headers={
"Authorization": f"Bearer {os.environ['ROBOFLOW_API_KEY']}",
"Content-Type": "application/x-www-form-urlencoded",
},
).json()
detections = sv.Detections.from_inference(result)
print(f"객체 {len(detections)}개를 찾았습니다")
annotated = sv.BoxAnnotator().annotate(image.copy(), detections)
annotated = sv.LabelAnnotator().annotate(annotated, detections)
cv2.imwrite("rf-detr.jpg", annotated)
```
{% endtab %}
{% tab title="SDK (파이썬)" icon="python" %}
이름을 지정한 객체의 윤곽을 그리는 대신 일반적인 객체 주위에 박스를 그리려면 다음을 호출하세요: `client.infer()` 모델 ID를 사용합니다. `client.sam3_concept_segment()`. 이 예제는 미리 만들어진 [RF-DETR](https://docs.roboflow.com/models/supported-models/rf-detr) 모델을 사용합니다. 이 모델은 차량, 사람, 반려동물 같은 일반적인 객체를 감지할 수 있습니다. RF-DETR은 Apache 2.0 라이선스이므로 상업적 사용도 무료입니다:
```python
result = client.infer(image, model_id="rfdetr-medium")
detections = sv.Detections.from_inference(result)
print(f"객체 {len(detections)}개를 찾았습니다")
annotated = sv.BoxAnnotator().annotate(image.copy(), detections)
annotated = sv.LabelAnnotator().annotate(annotated, detections)
cv2.imwrite("rf-detr.jpg", annotated)
```
{% endtab %}
{% endtabs %}
RF-DETR은 자동차, 버스, 사람, 오토바이를 감지합니다
## 자신의 모델이나 다른 모델 실행하기
동일한 `client.infer()` 또는 `POST /{project}/{version}` 호출은 해당 모델의 `model_id`:
* Roboflow에서 학습한 모델입니다. 해당 모델 ID(형식: `{project}/{version}`)를 [Roboflow 앱](https://app.roboflow.com)
* 의 공개 모델 [Roboflow Universe](https://docs.roboflow.com/datasets/universe/universe/what-is-roboflow-universe)
* 미리 만들어진 [사전 학습된 모델](https://docs.roboflow.com/models/pretrained-aliases) 을 별칭으로 실행할 수 있습니다. 예: `rfdetr-nano`, `rfdetr-seg-medium` 또는 `yolo26l-640` (Inference SDK에서만 사용). RF-DETR은 Apache 2.0이며, YOLO26은 AGPL-3.0이지만 Roboflow에 배포할 때 상업용 라이선스가 포함됩니다. 다음을 참조하세요. [모델 라이선스](https://docs.roboflow.com/models/model-licenses)
## 다음 단계
이제 클라우드에서 모델을 실행 중입니다. 여기서 다음을 할 수 있습니다:
* 자신의 하드웨어에서 같은 모델을 실행합니다. 다음을 참조하세요. [로컬에서 모델 실행하기](/get-started/ko/guides/run-a-model-locally.md)
* 대형 모델과 안정적인 트래픽을 위해 전용 단일 테넌트 엔드포인트를 얻습니다. [전용 배포](https://docs.roboflow.com/deployment/roboflow-cloud/dedicated-deployments)
* 모델과 로직을 하나의 애플리케이션으로 연결합니다. [워크플로](https://docs.roboflow.com/workflows)
* 각 요청의 비용을 다음에서 확인하세요. [서버리스 요금 페이지](https://docs.roboflow.com/deployment/roboflow-cloud/serverless-api/pricing)