> For the complete documentation index, see [llms.txt](https://docs.roboflow.com/llms.txt). Markdown versions of documentation pages are available by appending `.md` to page URLs; this page is available as [Markdown](https://docs.roboflow.com/roboflow/roboflow-ko/annotate/ai-labeling/enhanced-smart-polygon-with-sam/smart-polygon.md).
# Smart Polygon (레거시)
{% hint style="info" %}
Roboflow는 이제 [향상된 Smart Polygon 경험을 제공합니다](/roboflow/roboflow-ko/annotate/ai-labeling/enhanced-smart-polygon-with-sam.md) Segment Anything Model(SAM)의 지원을 받습니다.
{% endhint %}
Smart Polygon은 Roboflow Annotate에서 사용할 수 있는 주석 도우미입니다. 이미지의 객체에 대한 다각형 주석을 생성하는 데 Smart Polygon을 사용할 수 있습니다.
## Smart Polygon 사용 방법
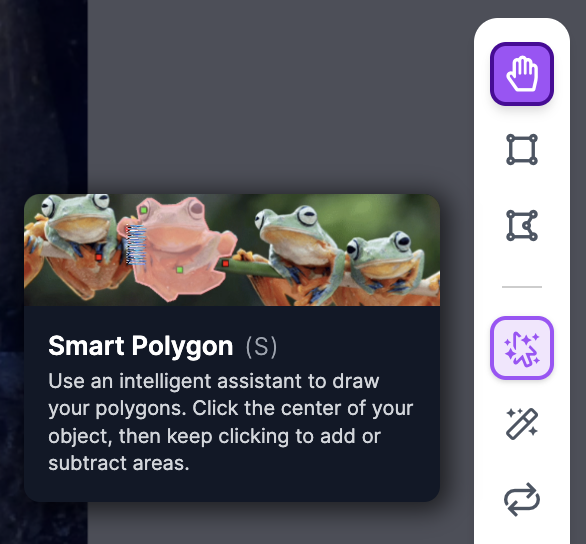
Smart Polygon 기능을 사용하려면 레이블링 툴바에서 Smart Polygon을 클릭하세요(단축키: `S`).
Annotation Toolbar의 Smart Polygon
그런 다음, 레이블을 지정하려는 객체의 중심을 클릭하면 Smart Polygon이 해당 객체에 초기 레이블을 적용합니다.
보라색 윤곽선은 한 번의 클릭으로 생성된 Smart Polygon 주석입니다.
이 기능은 내부적으로 머신러닝 모델을 사용해 객체의 형태를 제안합니다.
대상 다각형은 한 번의 클릭만으로 정확하게 예측될 수 있으며, Enter를 누른 다음 객체의 클래스를 선택하여 다음 객체로 이동할 수 있습니다.
다각형이 객체에 더 잘 맞도록 하려면, 강조되어서는 안 되는 객체의 영역을 클릭하세요. 이 영역은 부정 포인트로 추가되며, 주석 도구에서는 작은 빨간 상자로 표시됩니다.
한때 다각형의 일부였지만 이제는 제거된 영역을 빨간 점으로 표시한 다각형입니다.
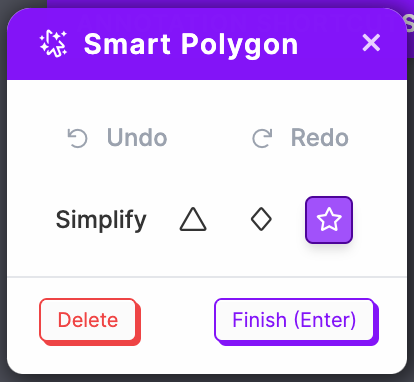
주석 도구 왼쪽 상단의 Smart Polygon 옵션을 사용하면 Convex Hull, Smooth, Complex 레이블 사이를 전환하여 레이블의 꼭짓점 수를 선택할 수 있습니다. 실수한 경우 배치한 포인트를 실행 취소할 수도 있습니다.
## Segmentation 레이어 시각화
Smart Polygon은 semantic segmentation 데이터의 레이블 지정에도 유용합니다. 모델을 학습시키고자 하는 방식에 따라 마스크가 올바르게 쌓이도록 객체의 z-index를 적절히 정렬하세요. 다음을 사용하여 쌓인 상태를 시각화할 수 있습니다. `Layers` 사이드바의 탭입니다. 이렇게 하면 rasterized된 뒤 segmentation mask가 어떻게 보일지 이해하는 데 도움이 됩니다.
해당 `Layers` 탭은 모든 Roboflow 프로젝트 유형에서 사용할 수 있습니다. 다음의 순서를 변경하지 않고 바운딩 박스를 편집하려면 `Layers`, 편집하려는 Layer/annotation을 `Layers` 탭에서 클릭한 다음 편집을 진행하세요.
---
# Agent Instructions
This documentation is published with GitBook. GitBook is the documentation platform designed so that both humans and AI agents can read, navigate, and reason over technical content effectively. Learn more at gitbook.com.
## Querying This Documentation
If you need additional information that is not directly available in this page, you can query the documentation dynamically by asking a question.
Perform an HTTP GET request on the current page URL with the `ask` query parameter:
```
GET https://docs.roboflow.com/roboflow/roboflow-ko/annotate/ai-labeling/enhanced-smart-polygon-with-sam/smart-polygon.md?ask=
```
The question should be specific, self-contained, and written in natural language.
The response will contain a direct answer to the question and relevant excerpts and sources from the documentation.
Use this mechanism when the answer is not explicitly present in the current page, you need clarification or additional context, or you want to retrieve related documentation sections.