# Dedicated Deployment पर Requests करें

### Python SDK का उपयोग करें

कृपया हमारे Python SDK का नवीनतम संस्करण इंस्टॉल करें [inference\_sdk](https://pypi.org/project/inference-sdk/) के साथ `pip install --upgrade inference-sdk`.

जब आपका dedicated deployment तैयार हो जाए, तो उसका URL कॉपी करें:

<figure><img src="/files/3932df1c38e72ca652de5a07227c2f63e0ad782a" alt=""><figcaption><p>जब आपका dedicated deployment तैयार हो जाए, तो उसका URL कॉपी करें</p></figcaption></figure>

और इसे पैरामीटर में पेस्ट करें `api_url` शुरू करते समय `InferenceHTTPClient` , और बस इतना ही!

यहाँ model inference चलाने का एक उदाहरण है, आप अधिक विवरण यहाँ पा सकते हैं [inference\_sdk के दस्तावेज़ में](https://inference.roboflow.com/inference_helpers/inference_sdk/).

```
from inference_sdk import InferenceHTTPClient

CLIENT = InferenceHTTPClient(
    api_url="https://dev-testing.roboflow.cloud",
    api_key="ROBOFLOW_API_KEY"
)

image_url = "https://source.roboflow.com/pwYAXv9BTpqLyFfgQoPZ/u48G0UpWfk8giSw7wrU8/original.jpg"
result = CLIENT.infer(image_url, model_id="soccer-players-5fuqs/1")
```

### HTTP API का उपयोग करें

आप भी एक्सेस कर सकते हैं [HTTP APIs](https://inference.roboflow.com/api/) जो यहाँ सूचीबद्ध हैं `/docs`उदा.,, `https://dev-testing.roboflow.cloud/docs` .

कृपया अपना workspace संलग्न करें `api_key` इन endpoints को एक्सेस करते समय query parameter के रूप में।

HTTP API का उपयोग करके ऊपर जैसा ही अनुरोध करने का एक उदाहरण यहाँ है:

```
import requests
import json

api_url = "https://dev-testing.roboflow.cloud"
model_id = "soccer-players-5fuqs/1"
image_url = "https://source.roboflow.com/pwYAXv9BTpqLyFfgQoPZ/u48G0UpWfk8giSw7wrU8/original.jpg"

resp = requests.get(f"{api_url}/{model_id}", params = {"api_key": "ROBOFLOW_API_KEY", "image": image_url})
result = json.loads(resp.content)
```

### Workflow UI का उपयोग करें

एक dedicated deployment को चलाने के लिए backend server के रूप में भी उपयोग किया जा सकता है [Roboflow Workflows](https://roboflow.com/workflows/build)। Roboflow Workflows एक low-code, web-based application builder है जो computer vision applications बनाने के लिए है।

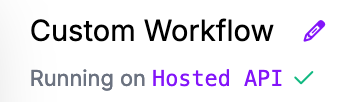
अपना workflow बनाने के बाद, क्लिक करें **Running on Hosted API** ऊपरी बाएँ कोने में link:

<figure><img src="https://blog.roboflow.com/content/images/2024/09/Screenshot-2024-09-03-at-18.26.29.png" alt="" height="102" width="354"><figcaption><p>वह backend बदलना जहाँ workflow execute होगा।</p></figcaption></figure>

क्लिक करें **Dedicated Deployments** अपने dedicated deployments की सूची देखने के लिए, target deployment चुनें, फिर क्लिक करें **Connect**:

<figure><img src="/files/b3b53efc8bf7f4f252f7bee3838e3068495317fa" alt=""><figcaption><p>workflow execution के लिए backend server के रूप में एक target dedicated deployment चुनें।</p></figcaption></figure>

अब आप workflow editor में अपने dedicated deployment का उपयोग करने के लिए तैयार हैं।


---

# Agent Instructions: Querying This Documentation

If you need additional information that is not directly available in this page, you can query the documentation dynamically by asking a question.

Perform an HTTP GET request on the current page URL with the `ask` query parameter:

```
GET https://docs.roboflow.com/roboflow/roboflow-hi/deploy/dedicated-deployments/make-requests-to-a-dedicated-deployment.md?ask=<question>
```

The question should be specific, self-contained, and written in natural language.
The response will contain a direct answer to the question and relevant excerpts and sources from the documentation.

Use this mechanism when the answer is not explicitly present in the current page, you need clarification or additional context, or you want to retrieve related documentation sections.