> For the complete documentation index, see [llms.txt](https://docs.roboflow.com/llms.txt). Markdown versions of documentation pages are available by appending `.md` to page URLs; this page is available as [Markdown](https://docs.roboflow.com/roboflow/roboflow-jp/depuroi/dedicated-deployments/make-requests-to-a-dedicated-deployment.md).

# Dedicated Deployment にリクエストを送る

### Python SDKを使用する

最新バージョンのPython SDKをインストールしてください [inference\_sdk](https://pypi.org/project/inference-sdk/) with `pip install --upgrade inference-sdk`.

dedicated deployment の準備ができたら、そのURLをコピーしてください：

<figure><img src="/files/ac401bc13b90ca00108a8f61287b85601371b3cd" alt=""><figcaption><p>準備ができたら dedicated deployment のURLをコピーしてください</p></figcaption></figure>

そして、パラメータに貼り付けてください `api_url` 初期化時に `InferenceHTTPClient` 、それで完了です！

モデル推論を実行する例を以下に示します。詳細は [inference\_sdk のドキュメント](https://inference.roboflow.com/inference_helpers/inference_sdk/).

```
from inference_sdk import InferenceHTTPClient

CLIENT = InferenceHTTPClient(
    api_url="https://dev-testing.roboflow.cloud",
    api_key="ROBOFLOW_API_KEY"
)

image_url = "https://source.roboflow.com/pwYAXv9BTpqLyFfgQoPZ/u48G0UpWfk8giSw7wrU8/original.jpg"
result = CLIENT.infer(image_url, model_id="soccer-players-5fuqs/1")
```

### HTTP APIを使用する

次のものにもアクセスできます [HTTP API](https://inference.roboflow.com/api/) 以下に一覧表示されている `/docs`、例： `https://dev-testing.roboflow.cloud/docs` .

workspace を添付してください `api_key` これらのエンドポイントにアクセスする際、クエリパラメータとして

以下は、HTTP API を使用して上記と同じリクエストを行う例です：

```
import requests
import json

api_url = "https://dev-testing.roboflow.cloud"
model_id = "soccer-players-5fuqs/1"
image_url = "https://source.roboflow.com/pwYAXv9BTpqLyFfgQoPZ/u48G0UpWfk8giSw7wrU8/original.jpg"

resp = requests.get(f"{api_url}/{model_id}", params = {"api_key": "ROBOFLOW_API_KEY", "image": image_url})
result = json.loads(resp.content)
```

### Workflow UIを使用する

dedicated deployment は、実行するためのバックエンドサーバーとしても使用できます [Roboflow Workflows](https://roboflow.com/workflows/build)。Roboflow Workflows は、コンピュータビジョンアプリケーションを作成するためのローコードのWebベースのアプリケーションビルダーです。

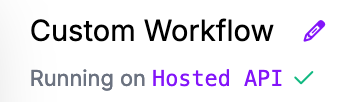
workflow を作成したら、 **Running on Hosted API** 左上隅のリンクをクリックしてください：

<figure><img src="https://blog.roboflow.com/content/images/2024/09/Screenshot-2024-09-03-at-18.26.29.png" alt="" height="102" width="354"><figcaption><p>workflow が実行されるバックエンドを変更します。</p></figcaption></figure>

クリック **Dedicated Deployments** dedicated deployment の一覧を表示するには、対象の deployment を選択してから、 **Connect**:

<figure><img src="/files/4cd63ba46c36c90aafdc9e5f681bd89b3228abca" alt=""><figcaption><p>workflow 実行のバックエンドサーバーとして、対象の dedicated deployment を選択します。</p></figcaption></figure>

これで workflow editor で dedicated deployment を使用する準備ができました。